Table of Contents
1 General Information
Welcome to the Dancers Association Fliers page! This page displays fliers for dance sessions and events, organized into convenient categories for both desktop and mobile viewing.
- 🗂️ Management: Admins and registered Instructors can add new fliers and manage existing ones.
- 🧹 Automatic Cleanup: To keep the content fresh, fliers are automatically removed after a set period.
- 💰 Pricing Policy: Per Association policy, instructors are requested to only upload fliers that clearly state the entry price.
- 🕺 Content: Please only publish fliers related to Israeli Folk Dancing (no ballroom dancing or trips that do not explicitly include dancing).
2 How to Register as an Instructor?
To manage fliers, you must first register at:
https://www.harokdim.org/users/register.php
(also available on the homepage top menu).
- Contact Info: Please provide a valid email and phone number for password recovery. Note: usernames cannot be changed after registration.
- Verification: After registering, an Admin will verify your status and upgrade you to "Instructor" status. Your profile color will turn orange, and you will gain access to edit the page.
- Support: If your status hasn't been updated within 3 days, or if you forget your username, contact us at: info@harokdim.org.
3 Page Structure
The page includes the following sections:
- A navigation submenu to jump directly to specific categories.
- Flier categories (Free sessions, Couples' Saturdays, Weekdays Sun–Sat, Weekends, Festivals, Radio, International, etc.).
Each flier includes a thumbnail image with 3 short lines of text underneath. In Morning Sessions the day of the week is shown above them, and the category is sorted by day and then by city. Each category header also shows how long fliers stay listed in that category (e.g. "shown for 4 months", or "shown until a week after the event") — see the full breakdown in section 6.
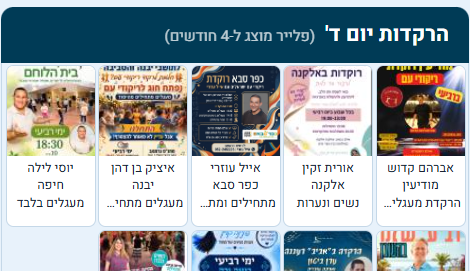
4 Page Actions (Based on Permissions)
View the page, use quick navigation, and click any flier to view it in full size in a window over the page (close it with the ✕ button, by clicking outside the window, or with the Esc key). Opening a flier reveals additional info you entered (e.g. location, start time, price, notes).
🔍 Enlarge: click the image in the window (or the "Enlarge" button) to show the flier full screen. Click the image again for actual size with scrolling, and once more to fit the screen again. Close with the ✕ button or the Esc key. On a phone you can also pinch to zoom.
Access the floating orange "Edit" button (pencil icon). Clicking it enters Edit Mode. Instructors can manage only their own fliers. Editors can also edit instructors' fliers and replace their images, and Admins can also delete any flier on the page. Admins can also hide a complete category (e.g. Holiday sessions).
🔒 Editors and Admins also see in the flier window (when viewing or editing) who uploaded the flier (with a link to the user's details), the upload date, and when the flier will be removed automatically.
5 Editing Actions
Note: a new flier is uploaded to the server immediately when you click "Save" in the add window. If you then click "Cancel & Exit", you will be asked whether to remove the fliers you added as well.
Note: replacing the image updates the upload date (and therefore the auto-removal date in categories removed by age). The flier stays assigned to the person who uploaded it — even when an Admin replaces the image, the instructor can still edit it and receives the auto-removal email.
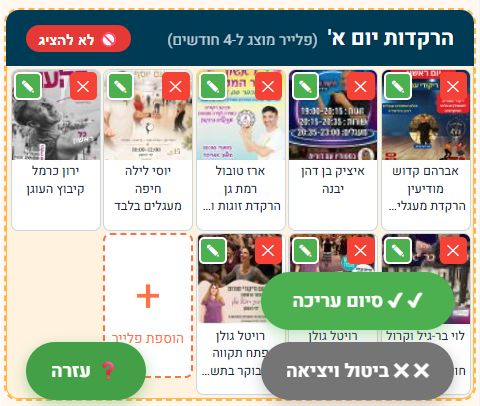
Shown here: a red "Do not display" badge next to a category header (Admins only, hides the category from the public view), and the floating action buttons — Help, Save & Finish, and Cancel & Exit.
6 Automatic Cleanup
The automatic removal date depends on the flier's category. In categories where an event date is entered, the flier is removed based on the event date only — so events can be published months in advance. In the other categories, the flier is removed after a fixed period from the upload date.
- Special & Couples Sessions — the day after the event date
- Holiday Sessions — one week after the holiday date
- Weekends — one week after the event date
- Festivals — one week after the festival date
- Abroad — one month after the start date
- Free Sessions — 6 months
- Morning Sessions, Weekday Sessions Sun–Sat, and Other Publications — 4 months
- Harokdim Radio — never removed automatically
7 Holiday Sessions and the Holiday Table
During holiday seasons the site also shows the Holiday Sessions table (in Hebrew). The fliers page is its source: every flier in the Holiday Sessions category appears in the table automatically, so a session only needs to be entered once.